Monday, February 25, 2013

Prawn stuffed chicken wrapped in turkey bacon

Third course, the meat!


Now to go really crazy with the amounts of meat I loaded up onto one plate I decided to make prawn stuffed chicken wrapped in turkey bacon!
Takes a bit of time to assemble but after that it is smooth sailing because you can knock it in the oven and forget about for a bit while you get onto to something else. I love dishes that you can forget about for a while because I think you need at least one of those when you serve courses. It is vital that you move quickly. I had problems being quick serving a party of eight, so I don’t think I want to think about entertaining more without any help. Stews and other slow cooked dishes might solve my problem here but I’ve realised that these dishes have slowly started to become a trend in my little swarays. Slow roasted lamb, goulash, slow cooked lamb shanks, chilli... No! It was time to cut down the cooking time from 4 hours to a maximum of 30 minutes!
I normally do not cook chicken unless it butter chicken! When I cook for people I generally like to do something a little more special and memorable, not fancy but something that is exciting to prepare as well as eat. However I have to agree that there is something very homey about chicken whether it is a roast bird, chicken rolls or a plain old curry.
Keeping in the theme I chose stuffed chicken because I love how something that looks so ordinary can have so much more depth and detailed when cut into.

Prawn stuffed chicken wrapped in turkey bacon

Serves 8

For the meat

  • 8 large prawns, cleaned, deveined, skins removed
  • 8 chicken breasts
  • 19 strips of turkey bacon (You may need more or less depending on the size of chicken you use)
  • 200g sharp cheddar, grated
  • Rosemary and Olive seasoning (You can use any seasoning you have. This was just what I had at hand)
  • Salt and Pepper for seasoning
  • Olive oil

Place the chicken flat on a board and using a meat tenderizer flatten out the breast slightly.

Rub with salt and pepper

Using a small knife create a long, deep incision on each breast enough to place a prawn inside

Sprinkle the prawns with the seasoning and place it within the cavity created keeping enough space to overlap the two sides of the chicken later

Sprinkle some cheese over the prawn

Overlap the two sides of chicken, closing the opening

Wrap the bacon around the chicken.

Heat oil on a wide frying pan over medium heat

Place the wrapped chicken carefully in the pan and sear all sides till the bacon looks golden brown and crispy

Now transfer the chicken to a slightly oiled baking dish and bake at 180o C for around 20 to 30 minutes 


For the Sauce

  • 1 large onion,diced
  • 3 cloves of garlic, minced
  • 2 tbsp tomato paste
  • 2 large whole peeled tomatoes, chopped
  • 1 tbsp dried thyme
  • 1 tbsp dried basil
  • 1 tbsp fennel seeds
  • Salt and pepper to taste
  • Olive oil

In a saucepan, heat the oil over medium heat. Add the onion and cook, stirring until golden brown

Add the garlic, fennel seeds and cook for about a minute

Stir in the tomato paste, tomatoes and herbs

Season and allow to simmer over low heat, covered for half an hour

Remove the cover and simmer for an added ten minutes.


To assemble

  • 2 handfuls of baby spinach
  • Balsamic reduction (optional)

Place the spinach on the dish and drizzled the reduction on top

Slice the chicken breasts into one inch wide slices and lay the bed of spinach

Pour over the sauce and serve warm


Friday, February 22, 2013

Ricotta and walnut ravioli

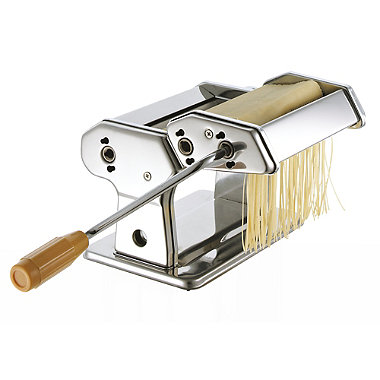
In news.... I got a pasta machine for my birthday!! :D so exciting! Oh the possibilities! Since I haven't been home since May last year I just got it!


I tried making tagliatelle and ravioli the first time and it turned out decent. In all honestly it isn't that hard to make fresh pasta! Plus side it hardly takes anytime to boil and it tastes much better than any dried pasta!

The basic recipe for pasta is 1 egg + 100g flour per person. Although I've seen it been done in a food processor, I have it a shot with my hands. Kneading does take a bit of work. If you are completely unfit like me your arms would probably be aching by the time you knead dough for 8 people. If you aren't a replica of the feeble me you'd probably just do fine.

"There's no secret to kneading. You just have to bash the dough about a bit with your hands, squashing it into the table, reshaping it, pulling it, stretching it, squashing it again. It's quite hard work, and after a few minutes it's easy to see why the average Italian grandmother has arms like Frank Bruno!" Jamie Oliver

Once you've created the dough you can either roll it immediately or cover it and put it in the fridge for about half an hour. Letting the dough rest will make it a little bit more easier to work with. I used my dough immediately but didn't have any troubles. To make things a little more easier to handle I worked in small batches.

For second course I made ricotta and walnut ravioli with a spiced pumpkin puree. Its not a looker for sure but bare with me. I promise to get better :)


For the filling I mixed the ricotta with chopped walnuts and basil. I made the terrible mistake of not seasoning so make sure you season to taste! Ricotta is a very mild cheese and it compliments bolder flavors in the dish with its rich creamy texture. I roasted the pumpkin with salt, cumin and pepper, pureed it and spooned it over the silky pasta.

With ravioli, the possibilities of stuffing is really endless! Its so exciting!! If you want something that doesn't take much work try a stuffing of smoked salmon and cream cheese with chives... absolutely lovely!

Amalfi Salad

First course was a simple Amalfi salad that i got from Jaimie's Italy. Its a lovely dish to start out with because its light and flavorful and probably a good way to build up to the heavier dishes.  This salad originates from the Amalfi coast, a stretch of coastline in Southern Italy. Amalfi is well known for the abundant citrus fruit that grows here and rightfully so this salad packs in the flavors with slices of sweet orange.

The key to this salad is to slice all the vegetables very thinly. My knife skills are pretty lousy so I used a kitchen mandolin which made things much more simple.
Simple slice up baby radish, cucumber, fennel, red onion and oranges and toss it in a dressing of olive oil, vinegar and salt and pepper.... rather effortless I would say!

Im back with the big dinner #2!

Those who know me well would already know how much I love big dinners, the preparation, the decoration, the theme and most importantly the food!
Ever since I got to Oman, its been days of working, dreaming about food and procrastinating on uni applications. Really really need to get around to it! No really!

My sister and cousin were in town so it meant more nights of long movies (I was always the first to nod off), idle chat and no sleep. Both of them are going back to uni soon while I remain behind still trying to figure out what I'm doing with my life. Its been lovely to be back home, no doubt but living here can sometimes be incredibly boring. Which means that most of the time you need to come up with things to amuse yourself like this dinner....
I figured ... a going away dinner? Why not?


For sometime now I have been really drawn towards pastels and neutrals, lace, flowers, the classics, stamps, postcards and antiques. There seems to be so much beauty and sentiment in things that have been collected over the years, so for this dinner I wanted to dress everything up to look pretty, elegant and detailed.
Scavenging through the house I came up with ;
 
 A whole load of old and new put together to set the mood perhaps?

 
Postcards and a few classic novels

An old pendulum clock, jewellery and a picture of my brother and mum

 
Dad's old briefcase and stamp album from when he was 12

 So here's me setting the mood with little vanilla cupcake, pomegranate fizz and my 'vintage' (almost) set up.  


Ditched the napkin rings for some peach ribbon and added a tiny bouquet of flowers to each setting. To make the bouquet I folded a sheet of dolly paper into a cone... thats it, but the little lace-like dolly paper added a little interesting detail


The Menu

Amalfi Salad
Ricotta and walnut ravioli
Prawn stuffed chicken rolls wrapped in turkey bacon
Poached pear
Keep posted for more on the food!


Wednesday, February 6, 2013

Panda Cupcakes


Sometimes I have these fabulous ideas and I never follow through. I almost never try and make something happen.
It has been an interesting few months. Never thought I’d end up here but here I am. I’d love if this was all fun and games but its not and I really can’t wait to go back home. I’ve been thinking of what I would do when I go back home and I really think I should do something with my cooking/baking seriously this time. Take on a few orders and give it a shot. Trying to reach for the stars here but who knows really what can happen.

I took on my first cupcake order a few weeks back; 40 cupcakes for a 4 year old boy’s birthday. I don’t think I’ve ever made 40 cupcakes so I needed to keep the icing a bit simple. Especially with my dire lack of tools and ingredients it was a bit daunting to make tiny neat things. I’m really glad I gave it a shot. Sure they weren’t perfect but maybe the imperfection added to the quirky appearance of the little ……………………….
Pandas!

Doing some research before I made these cupcakes, I must say that there are a number of panda cupcake designs online. I am sure you could attempt most of them if you had the ingredients but I had to make do with what I had.

For the icing I used a normal butter cream icing, desiccated coconut, royal icing (brown and white) and a bit of chocolate icing.

I used a very basic chocolate cake recipe by Nigella (who else do you think of when you say chocolate cake?)
First I covered the cupcake with the butter cream frosting completely and dunked the top of the cupcake in desiccated coconut. If you live somewhere where you have an abundance of white dusting powder you can use that. Even though I initially just used coconut for the colour it ended up looking like fur which was perfect!
Next the eyes and ears. For this I used ready-to-roll royal icing that I have been raving about in previous posts. Only problem is its white. So you will have to colour the icing to make it black or dark brown for this. If you have ready made black fondant then problem solved: D I had to add a lot of black and brown colour to get the right colour. Again I had no gel colours so I used food colouring which I definitely will not recommend for this. The consistency of the colour won’t remain the same and it is so messy to handle when you add liquid colour to royal icing. Go find the gel!
Once I had shaped the black part of the eye I just stuck a tiny ball of white icing on top. Used the back of a satay stick dipped in black colouring to add more detail.
The mouth was just chocolate icing piped out of a bag and the nose was a normal sized chocolate chip.


I really enjoyed this because….. it worked out! :D I thought I was creating Frankenstein but who knew they would actually be kind of cute.
So my first cupcake order has been a success and I am looking forward to maybe doing a few more before I leave Sri Lanka. Ill be here till the 22nd of December so If you know someone who’d like some cupcakes give me a call.